-
A Quick Note: AutoLineage Trees
There are times when I think I don’t have a tree for a certain DNA match and will add one, only to discover that there was already a tree there. Especially if the tree was added automatically, and I can see how to add another generation or so to it. One way to check your…
-

New Copy and Paste Option in AutoLineage
Great news for AutoLineage users! You no longer have to use “Save Page As” to import your Ancestry matches and shared matches—there’s a faster way with simple copy and paste. Instead of saving files to your computer, you can now copy your match or shared match page in Ancestry and paste it directly into AutoLineage…
-
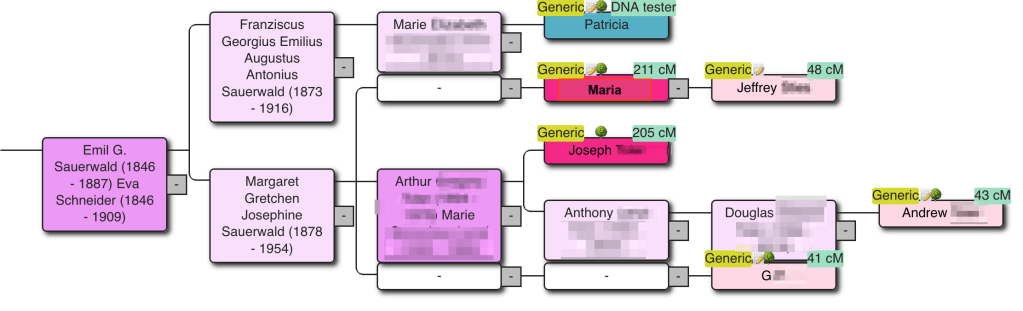
AutoKinship for MyHeritage and Ancestry: From Matches to Reconstructed Trees
AutoKinship generates a probability tree based on the DNA shared between matches. Within AutoLineage, this probability tree can be enhanced using reconstructed family trees, resulting in the refined outcome shown here. AutoLineage now includes a powerful new feature: the ability to predict trees based on DNA using AutoKinship on any cluster—even one with just two…
-
More Shortcuts for AutoLineage
Often your research is focused on a specific part of your family line. This was the case with Mary who wanted to explain her father’s Collins line. Where had the Collins family lived in Ireland? When did the immigrate to the United States? And could we find more cousins on the Collins line? She had…
-
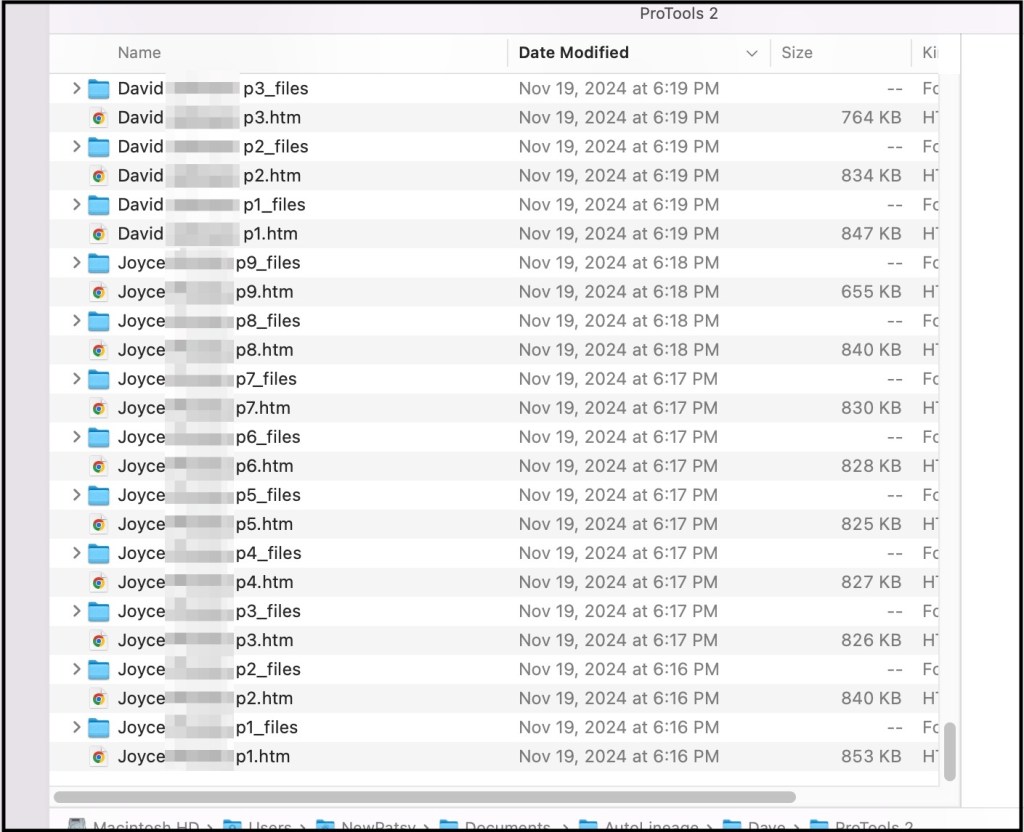
A Shortcut for Saving Pro Tools Shared Matches
If you have been collecting your Pro Tools shared matches for AutoLineage, you know it can take a bit of time. I’ve found another shortcut to speed up this collection. First I check if the match has a tree and look at the tree. If it’s only a few people and all are private, there’s…
-
Linking GEDmatch and FTDNA – AutoLineage for iGG
AutoLineage is a powerful tool that allows you to cluster your matches at a particular testing site but also to find common ancestors across multiple sites. In this blog, we will discuss a scenario when only data from FamilyTreeDNA (FTDNA) and GEDmatch can be used as sources, for instance for an investigative genetic genealogy search.…
-
Subscribe
Subscribed
Already have a WordPress.com account? Log in now.
