AutoKinship generates a probability tree based on the DNA shared between matches. Within AutoLineage, this probability tree can be enhanced using reconstructed family trees, resulting in the refined outcome shown here.

AutoLineage now includes a powerful new feature: the ability to predict trees based on DNA using AutoKinship on any cluster—even one with just two matches. The DNA tester is automatically added, and AutoKinship generates several tree hypotheses showing how the matches and the tester may be related.
Two enhancements in this version of AutoKinship are:
1. The option to use reconstructed trees (e.g., from “Find Common Ancestors”) to guide relationship inference.
2. The ability to define a known relationship between two matches.
We’ll explore how this works using data from MyHeritage. There are multiple ways to import MyHeritage data, such as via AutoCluster results or HTML files (similar to Ancestry). However, if you want to run AutoKinship, you must use the HTML files, since the AutoCluster output from MyHeritage’s DNA Tools lacks the required cM values between shared matches.
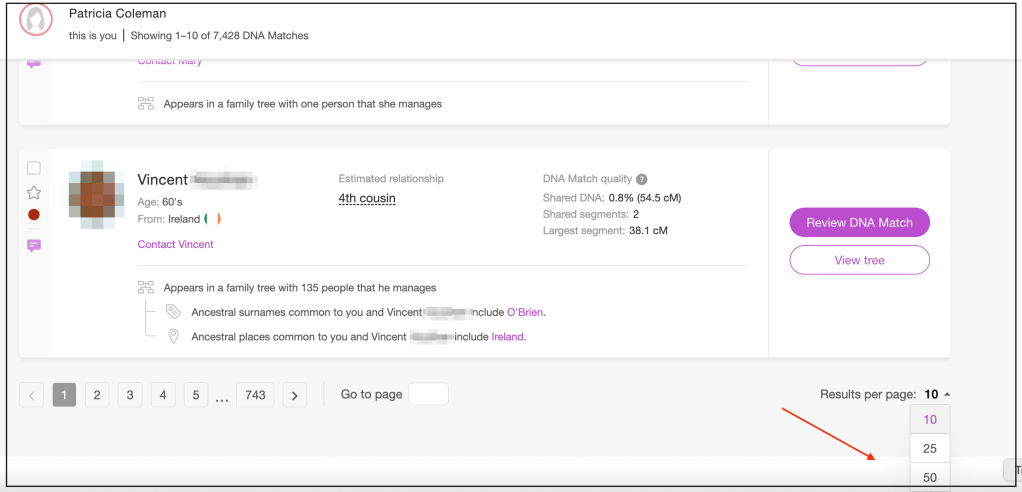
To get started we first set the MyHeritage matches page to display 50 matches per page. Scroll to the bottom of the DNA match page and the setting is on the lower right corner.
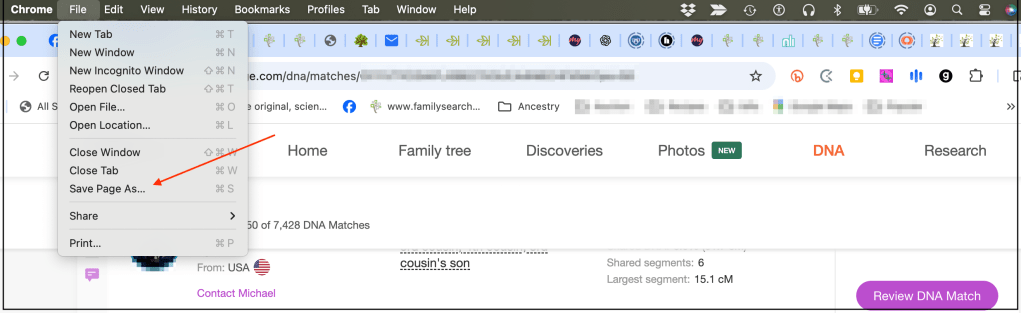
Once the page displays the 50 matches we use the ‘Save page as’ setting in the File menu to save the HTML file.
You can save as many pages of matches as you’d like for you analysis. The shared matches page often includes relationship hints like “Ancestral surnames” or “Shared ancestral places.” If a match has a tree, you can export it as a GEDCOM file using the Chrome plugin One2Tree.
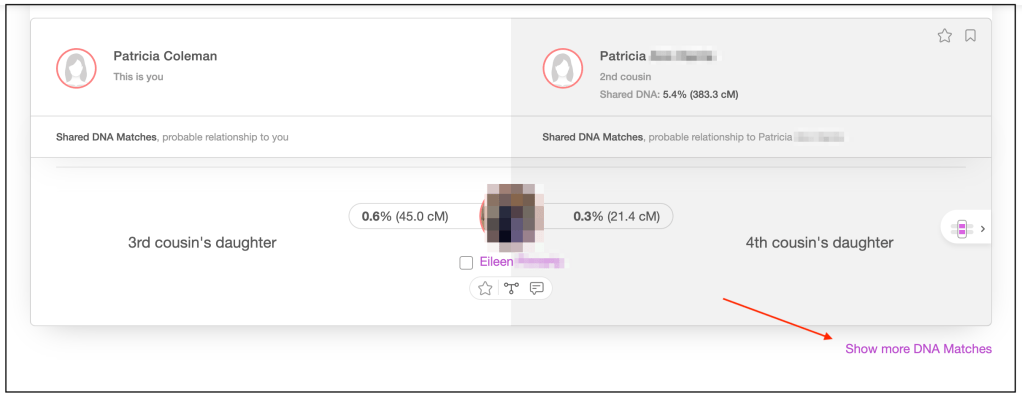
Next you’d want to collect shared matches. Select a specific match, and go to their shared matches page. MyHeritage displays the total number of shared matches at the top of the page.
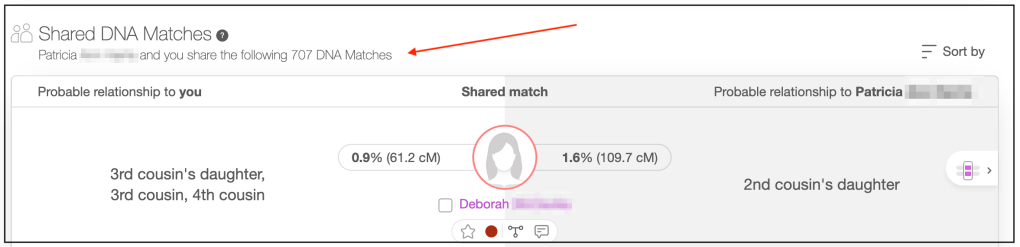
The page initially shows 10 matches. Click “Show more DNA matches” to load more in batches of 10 until you’ve collected as many as needed. I often will add shared matches until I reach a specific cM value.
After collecting shared matches for all relevant matches, the data is entered into AutoLineage.
Log into your Genetic Affairs account, scroll down the page and select AutoLineage. After going to my profile I select ‘Register autosomal DNA test’ and add MyHeritage.
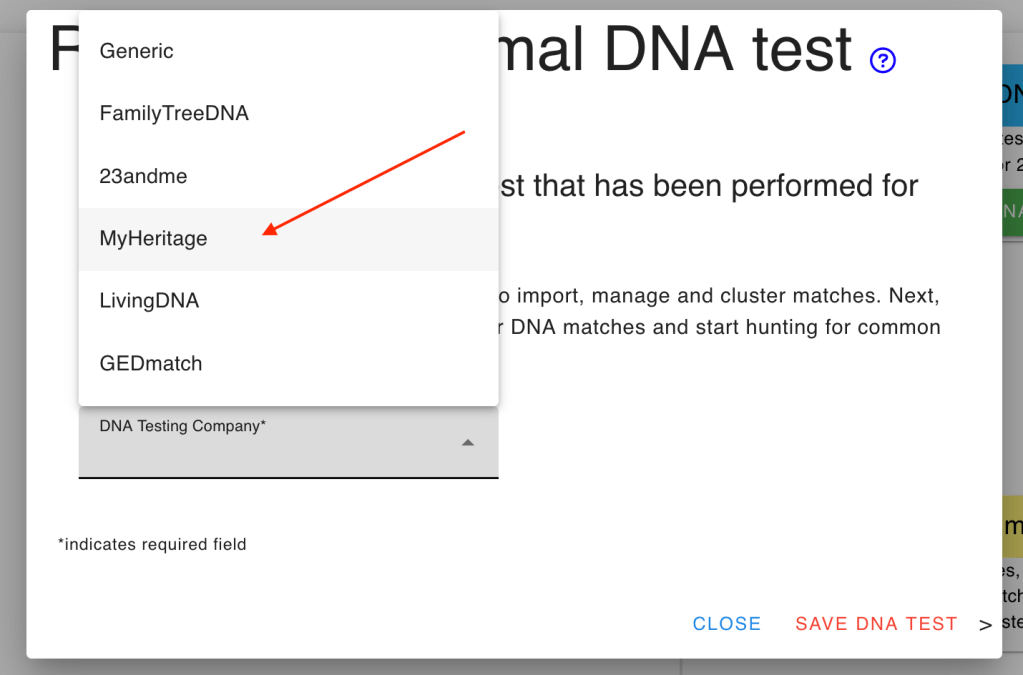
That brings up the ‘DNA overview’ page.

From the ‘DNA test overview’ page select ‘Import matches.’
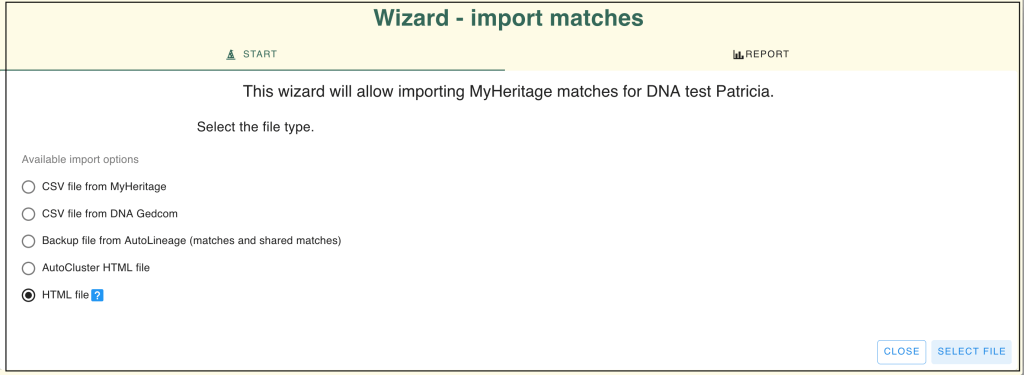
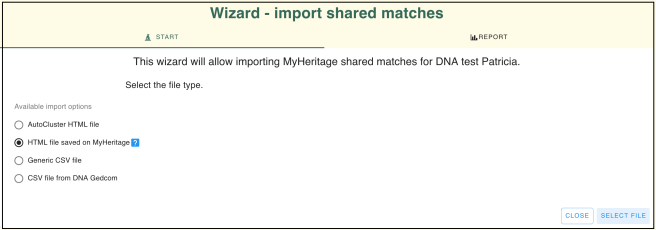
There are several options for importing MyHeritage matches. We have collected the HTML file, so that is the selection we need here. Once the matches are added, from the ‘DNA overview’ page select ‘Import shared matches.’
Once the matches and shared matches are imported, we can run a cluster for them.
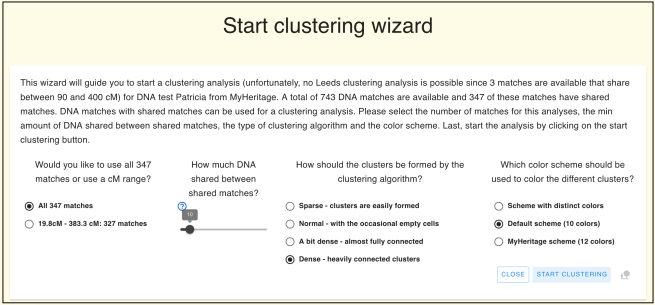
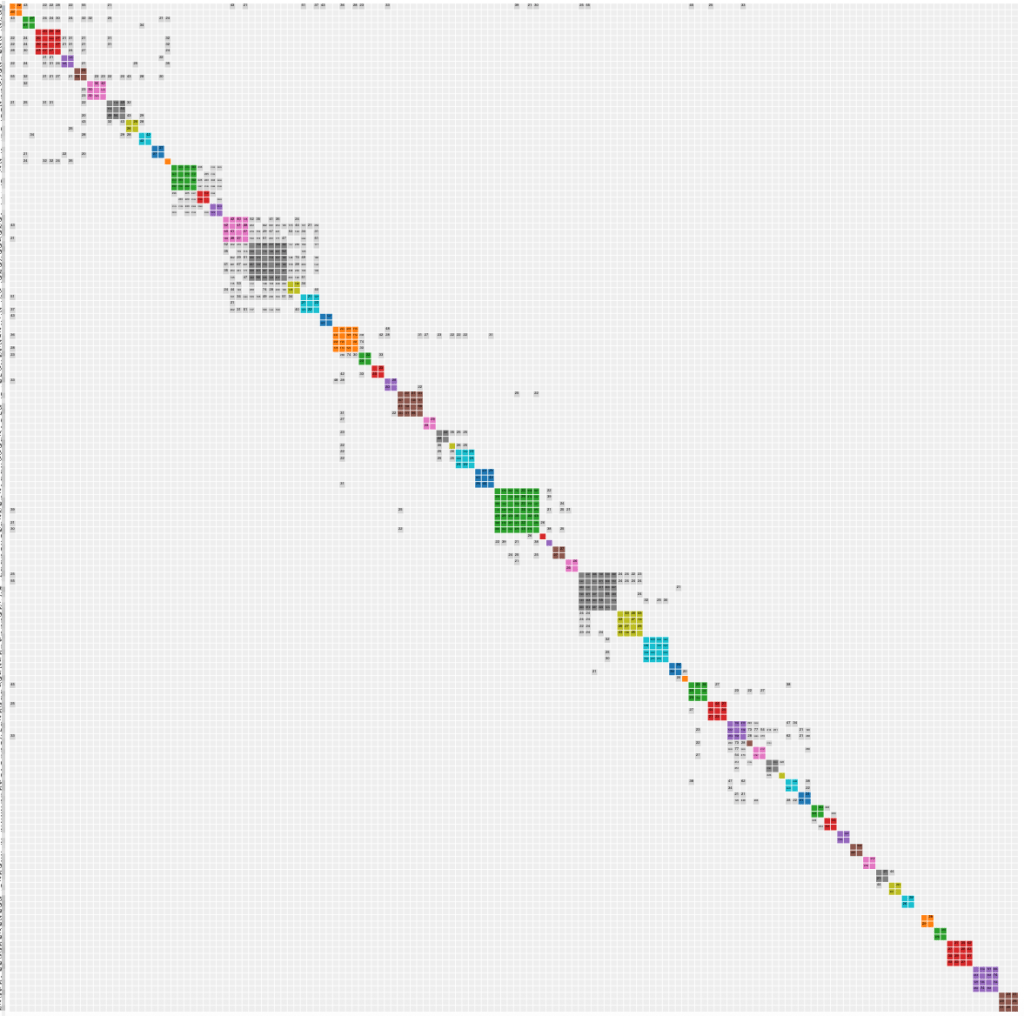
This results in a number of clusters.
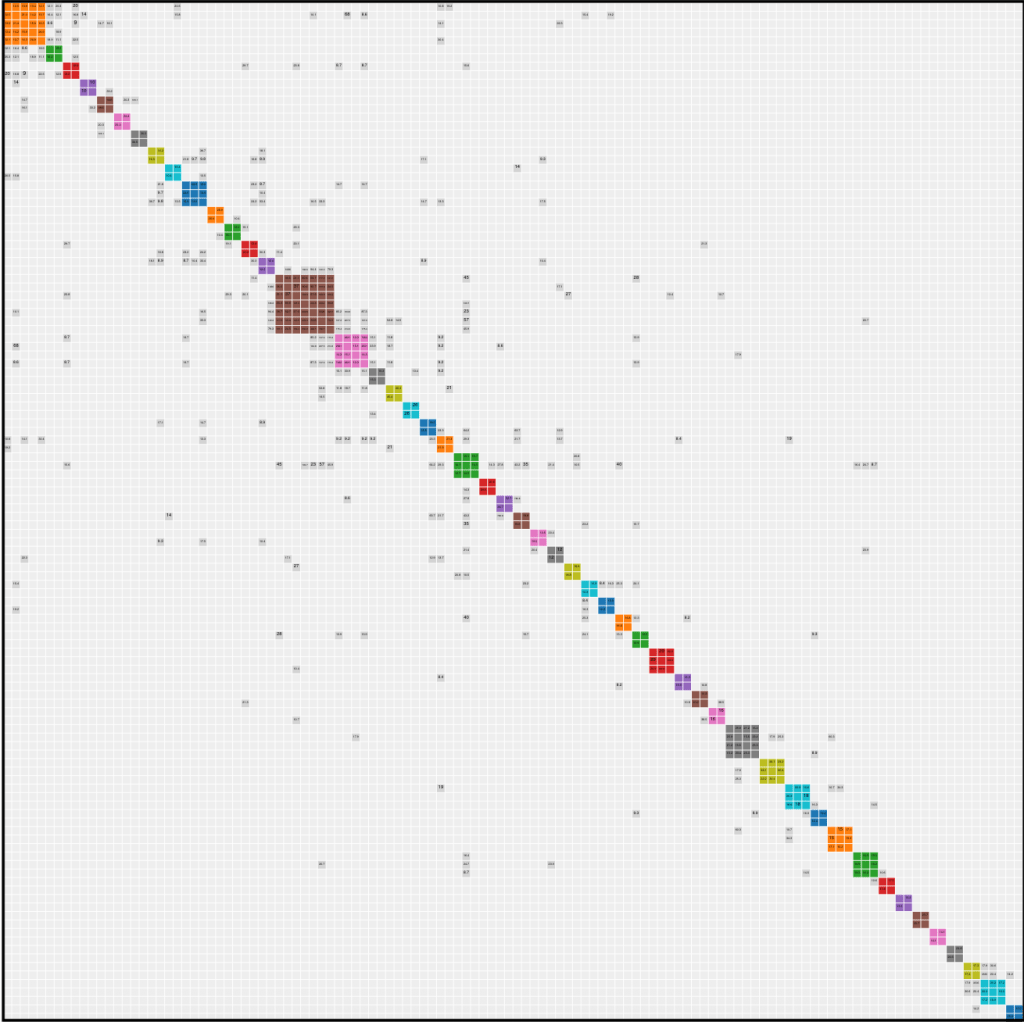
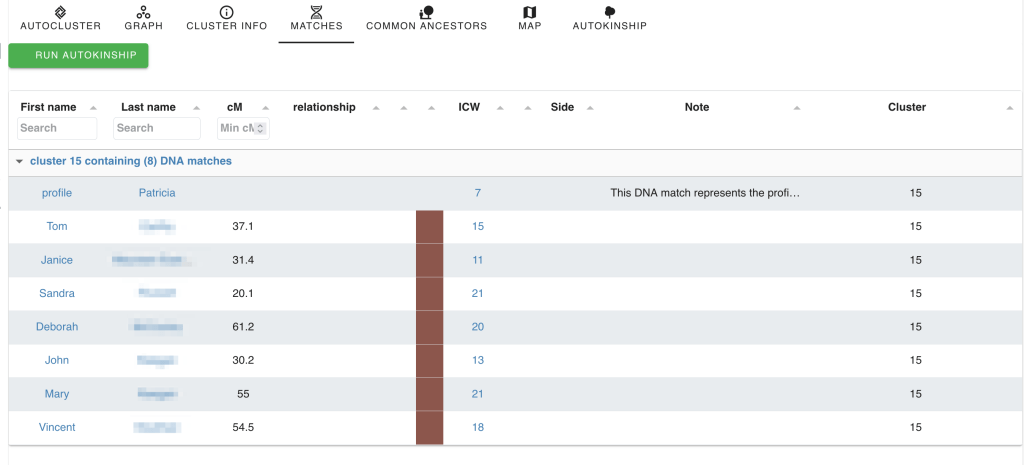
Let’s look at Cluster 15, the brown cluster with seven matches. Clicking “Matches” and scrolling to Cluster 15 shows all individuals in that cluster, including the DNA tester.
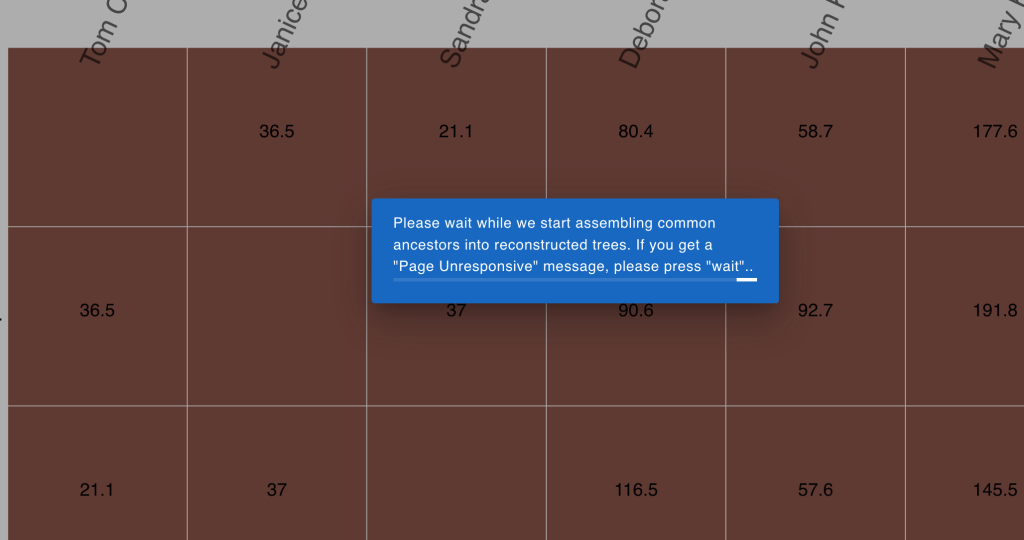
Clicking “Matches” again isolates the brown cluster and shows a message about assembling common ancestors.
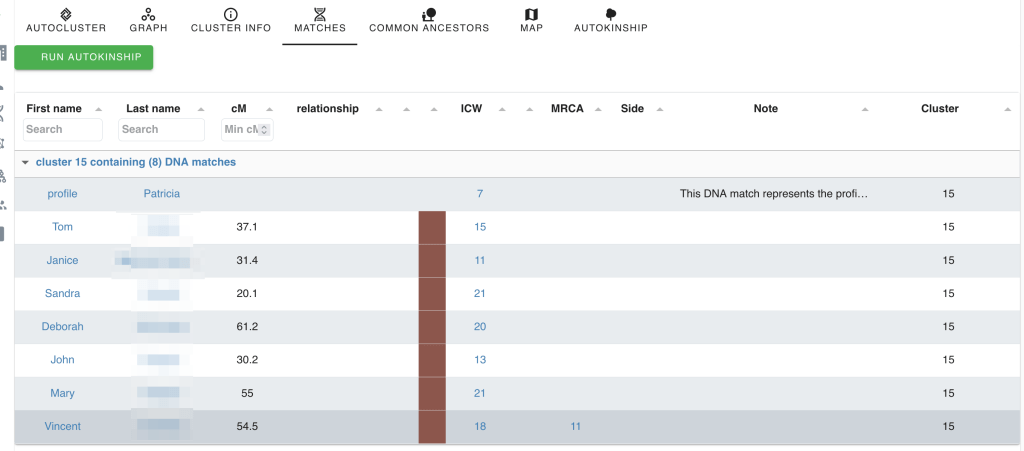
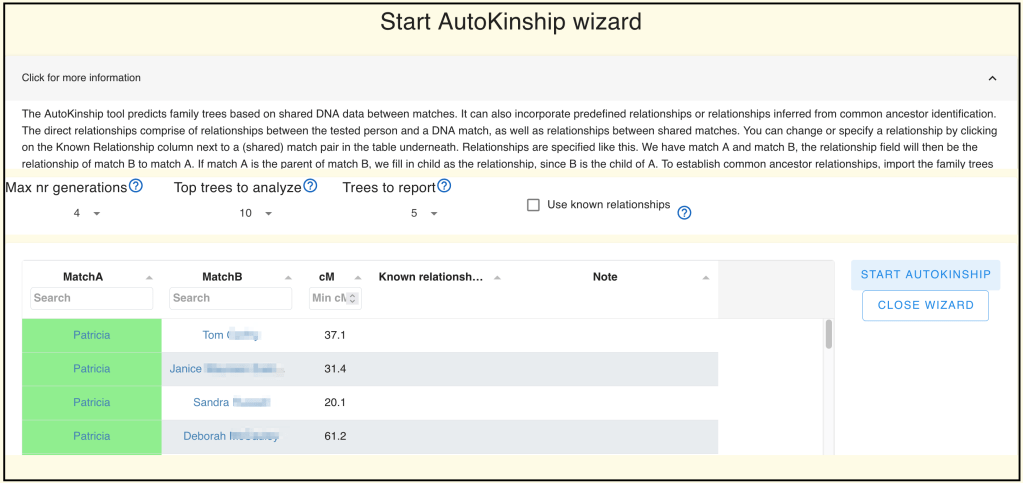
Clicking “Matches”once more brings up the match list and the “AutoKinship” button.
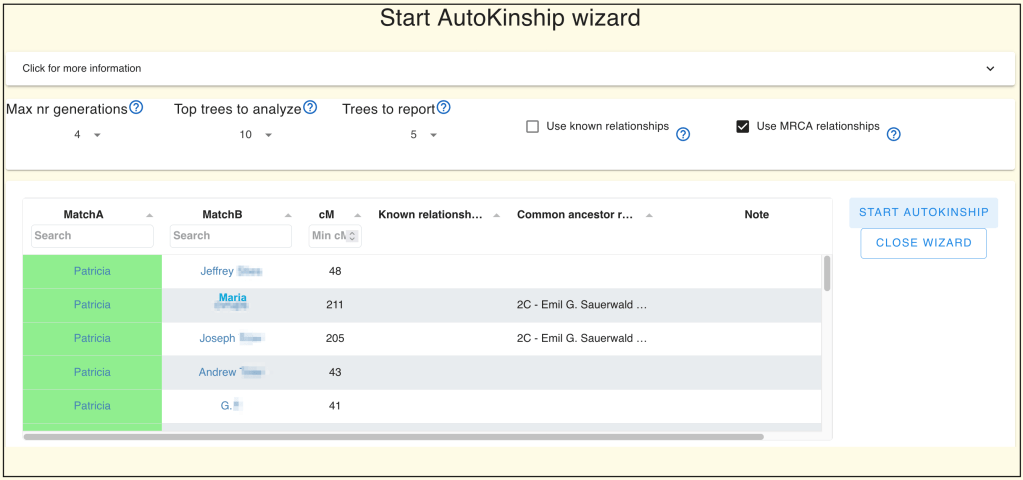
Clicking “Run AutoKinship” launches the AutoKinship Wizard. At the top, you’ll find an explanation of how to define known relationships between matches.
In our example, I don’t know my exact relationship to any of the matches, but I do know that Mary is John’s mother, as stated on MyHeritage.
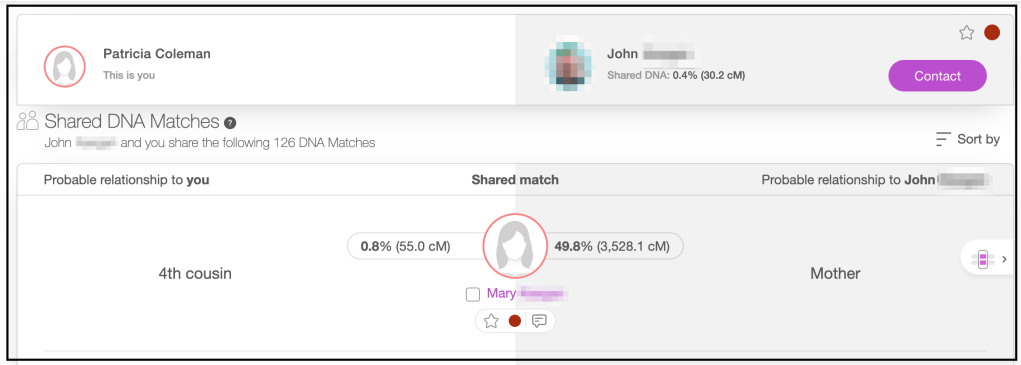
At the top of the ‘AutoKinship Wizard’ is the explanation of how to identify the mother-son relationship.
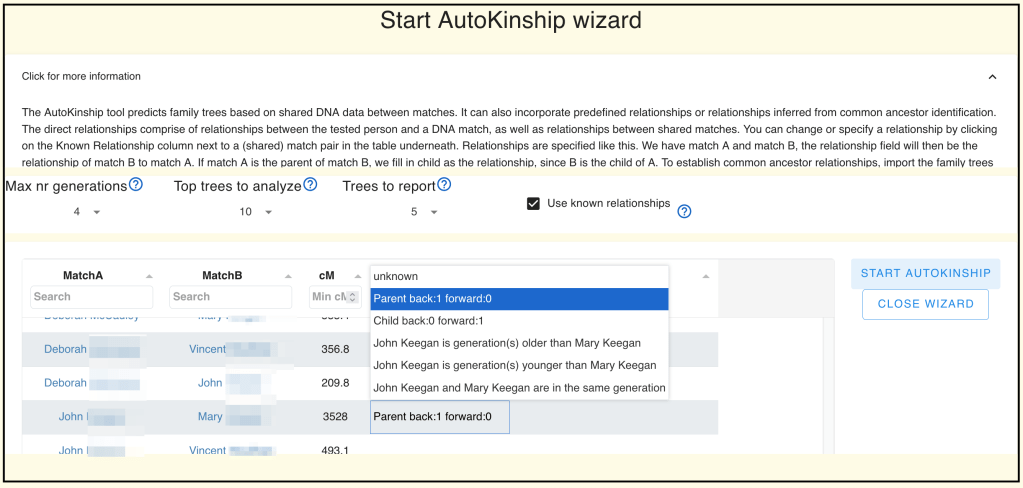
In this case John is MatchA and Mary is Match B. We start with John. To go from John to Mary we have gone back 1 generation, since she is his parent, and we don’t have to go forward any generations.
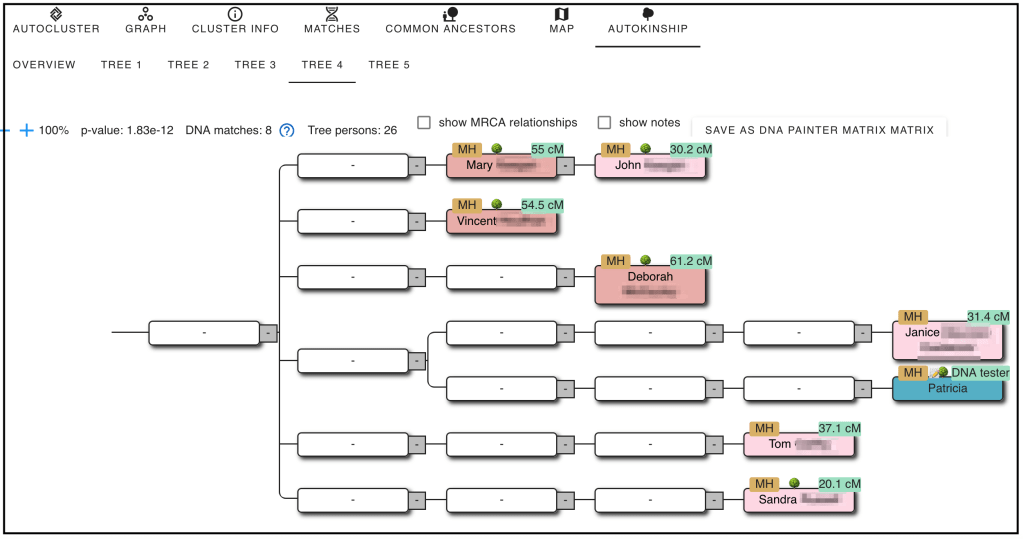
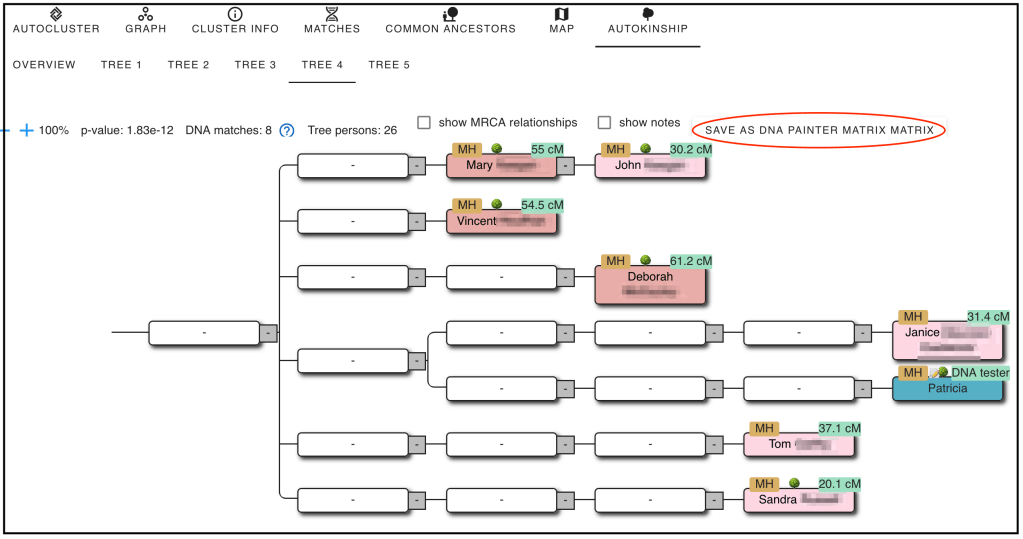
Now clicking on ‘Start AutoKinship’ will bring up an overview of the AutoKinship trees. Selecting the 4th tree:
Along with the AutoKinship we can save the data into a DNA Painter matrix.
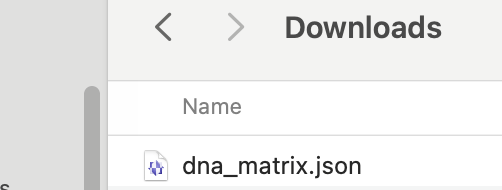
Clicking ‘Save as DNA Painter matix’ saves the file to your download folder. This file can be uploaded to the new DNA matrix tool at DNA Painter.
Open DNA Painter in another browser tab or window and go to DNA Painter tools. Scroll down to the Matrix.
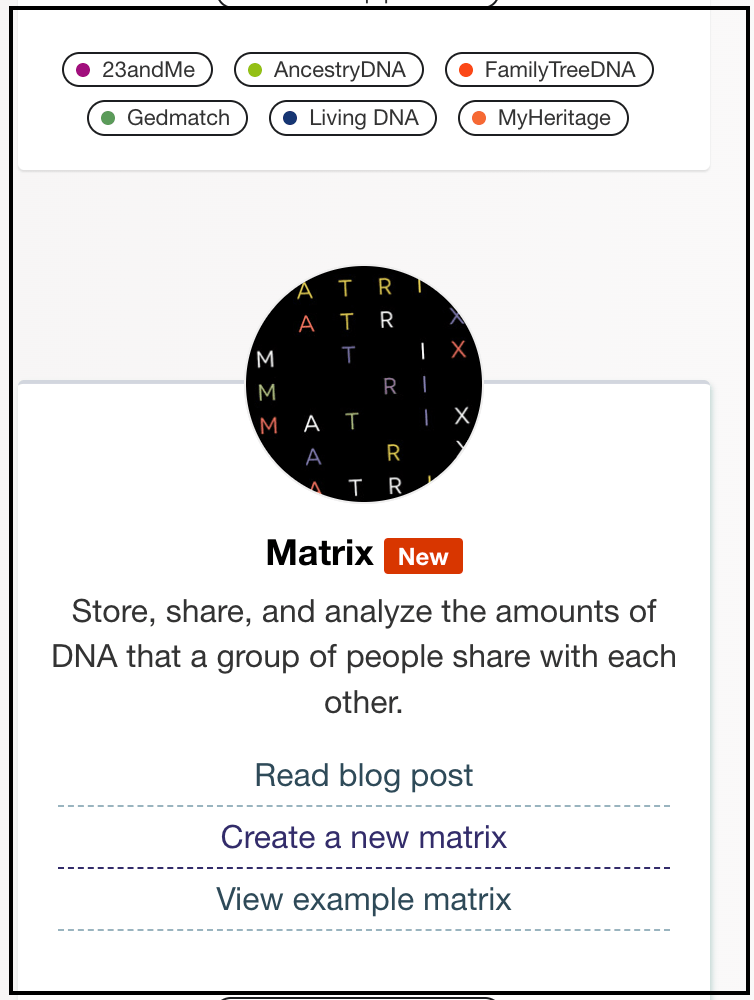
Select ‘Create a new matrix.’ A json file is one of the options under ‘Load.’
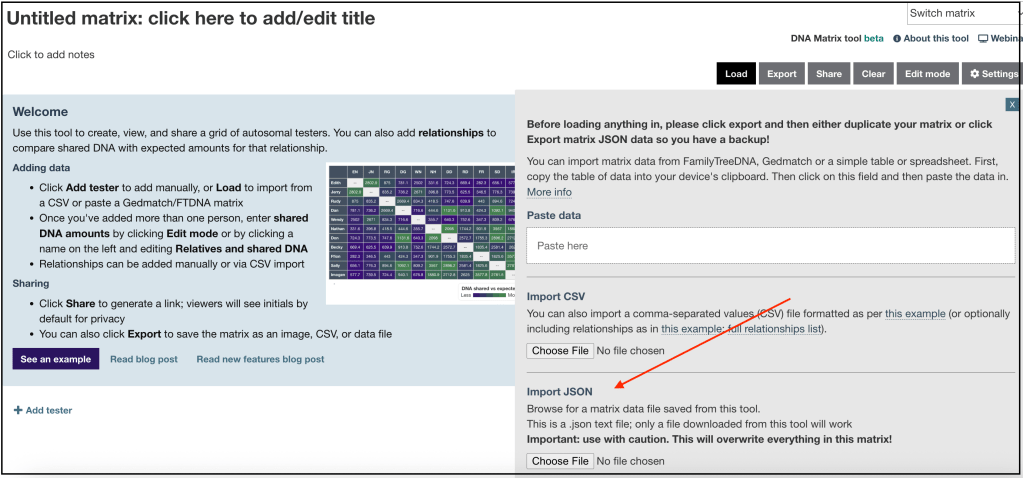
Select the json that you just saved to your download folder.
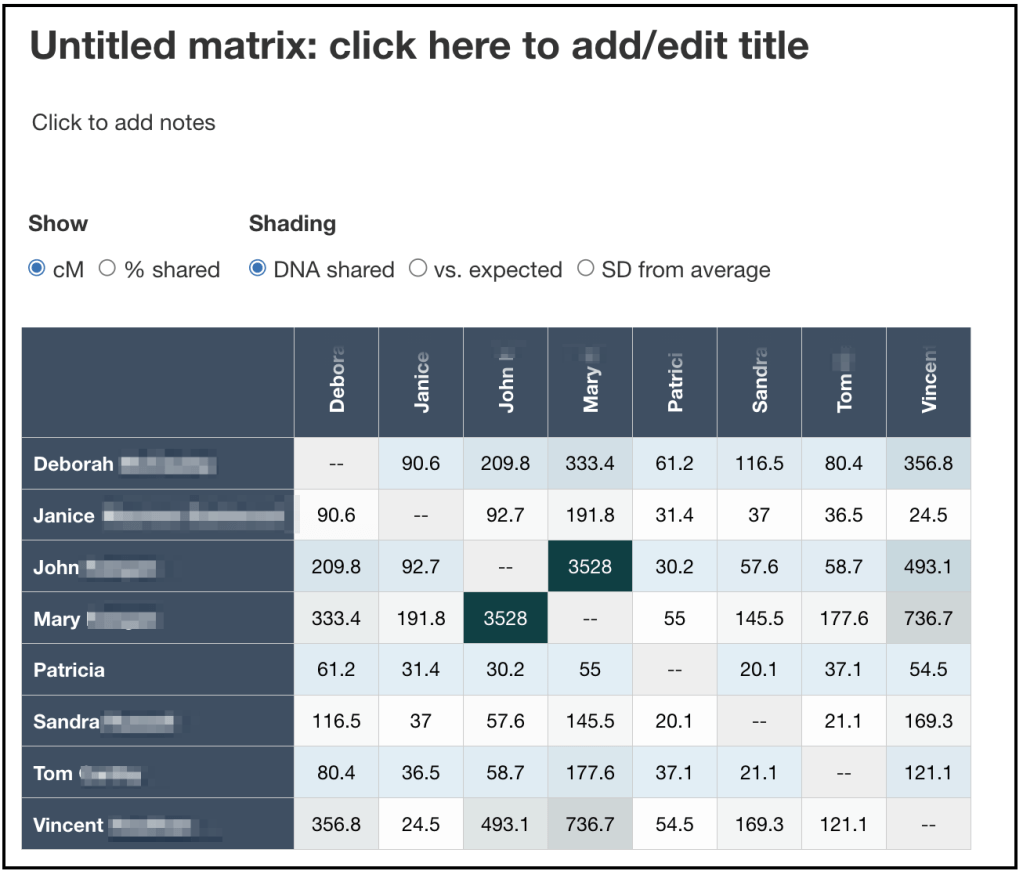
Now you can add notes about the data and give it a name to save it.
MyHeritage says that Vincent is Mary’s first cousin and Deborah is her first cousin once removed. The DNA Painter agrees with these settings. Mary’s family goes back to an O’Brien in County Limerick, Ireland. My second great grandmother was Johanna O’Brien also from County Limerick. No surviving records have been found in Ireland to confirm our connection, but it’s most likely on the O’Brien line.
Next we’ll look at a cluster from Ancestry and AutoKinship using the reconstructed trees.
The first cluster from Ancestry includes only two matches, but AutoKinship still works—it automatically adds the tester, resulting in a three-person group.
We’re going to look at cluster 37, the grey one just below the middle. It has seven people once I’ve been added to it. This cluster has some of my maternal cousins in it.

There are a number of grey cells from cluster 37 to cluster 38, but they won’t be included in the AutoKinship.
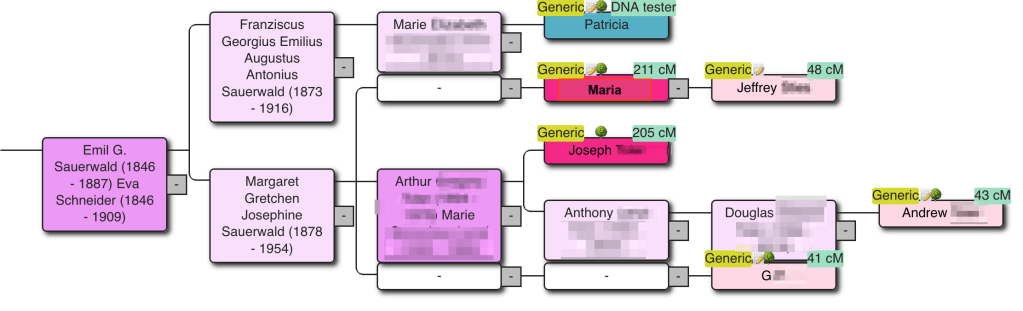
In this example we’re going to use the reconstructed trees that I had already run for my Ancestry and MyHeritage data. See my other blog post for more information on how to identify reconstructed trees based on trees from DNA matches.
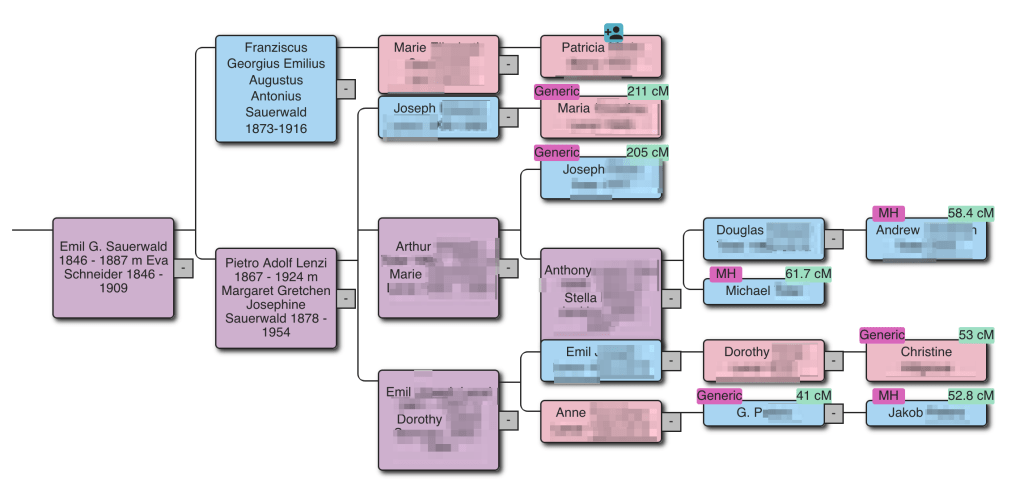
In the reconstructed tree you can see a number of the matches that are in cluster 37. Several matches that are on MyHeritage are also in the reconstructed tree. Now when we run the cluster with AutoKinship we can ‘Use MRCA relationships’ from the reconstructed tree to help in placing the people in the family.
After starting AutoKinship for Cluster 37, you’ll see a resulting tree based on MRCA relationships. In this example, Christine was excluded from the output, but the rest of the cluster—including Jeffrey (Maria’s son)—was included, even though Jeffrey’s tree wasn’t available during the “Find Common Ancestors” step.
Here we’ve used AutoKinship using MyHeritage and Ancestry data. Recently, Roberta Estes demonstrated how AutoKinship can also be used with Family Tree DNA results, both an automated version in Genetic Affairs and also a custom version using AutoLineage. Her blog can be found here.
In conclusion, AutoKinship can now be used on clusters from all testing platforms. In earlier examples, we showed how to use AutoLineage with GEDmatch, and now we’ve expanded the approach to MyHeritage and Ancestry.
What is more, AutoKinship supports two complementary ways to incorporate known relationship data:
1. Manually defining a known relationship in the AutoKinship Wizard.
2. Automatically using MRCA data from reconstructed trees.
These options significantly enhance your ability to explore and validate family connections within DNA clusters.

Leave a comment